Christmas Cats and Holiday Hounds

Busch sniffing LuLu
Busch checking out Lulu on the deck

This holiday season, if you are looking for a new family member, please don’t forget to check your local rescues and shelters first.  Missouri is one of the top states for puppy mill breeders.  Pets in pet stores are from puppy mills regardless of what the shop owner says.  No reputable breeder would let their dogs be showcased in a pet store with little exercise and little ventilation.  Not all dogs in shelters are mutts.  Two-thirds of dogs in shelters are pure breeds.  Even if you get a mutt, they can be the best dogs – I have had three wonderful foster mutts and have one very smart resident mutt!

Most rescues and shelters have low adoption fees ranging from $50 to $150.  That covers shots, microchip, vet exam, blood work and spay/neuter.  What a bargain!  You’re getting an amazing dog for the cost of the vet work.  Most rescues get the vet work done at a lower rate, so they are asking for much less than the actual vet bill would cost a regular person!  Some shelters do not charge an adoption fee, but require that the animal see a vet and be fixed within 30 days, but please uphold your end of the bargain!

The top reasons pets are dumped at the shelter:
1.  Moving
2.  New baby (By the way, kids love pets, and with great pairing, pets can feel the same way.)
3.  No time
4.  Cannot afford
5.  Allergies
6.  Personal problems (divorce, foreclosure)
7.  Soiling in house (Remember, this could be a sign of illness and not your pet’s fault.)
8.  Biting (Remember to pick a family friendly breed and always monitor small children with pets.)
9.  Runs away (Dogs can jump fences if determined.  Pick a fence to match the breed.)
10.  Untrained (Dogs need training – whether a book or a class, that’s up to you and your skill level.)

Remember to think long term.  Was this pet a family decision?  Do you know what annual vet bills cost?  Food?  Toys?  Grooming?  If you have to travel, where will the pet stay?  If you have to move, will the pet go with you?  If you have kids in the future, will the dog/cat stay or get the ol’ heave-ho?  If this is for kids and is their responsibility, will someone take up the slack if they forget?

If you do decide to spring for a pet, make sure it is a family decision.  Also, check with your vet or dog trainer/behaviorist about introducing new pets.  They can offer some great tips to help with the transition.  I like the Humane Society of Missouri’s tips for introducing new pets (dogs cats) along with other great information.  Dogs and cats are different than humans.  They are territorial and need time to adjust.  Keep small children away from dogs while they get acquainted – they may snap out of fear unintentionally.

Remember to be practical and rational in your decision.  Consider that winter might not be the best time to potty train a puppy.  Think about holiday travel plans.  Ask how the whole family will feel once the novalty wears off.  Or the puppy turns into a dog and the kitten a cat.  Think before you sign that adoption contract this holiday season.

Weekend Warriors and Bathrooms: Tile

If you’re like me, you simply cannot justify hiring a contractor when you can do the work yourself – and for much less.  In my most recent project, I tackled the bathroom.  My entire bathroom remodel cost right around $1500, including tile ($700), supplies/paint ($209), light fixtures ($203), sink ($60), toilet ($100), plumbing fixtures ($200), accessories ($100).  Considering I am a weekend warrior with many other commitments, I have worked the remodel in stages.  Most recently, Chris installed the light fixtures and I completed the shower tile.

Mentioning the act of tiling provokes in some people an unconscious twitch.  Fear not, my fellow Weekend Warriors!  I will help those of you who would like to tile and believe, like myself, in the act of Google-ing everything.  Google cannot show you the way to everything, but most things, yes.

To start tiling, first measure your area you would like to tile.  A good rule, like in photography, is not to split things in equal sections.  If you are only using one type of tile in your design, this is almost a mute point – but I will try to persuade you into a more dynamic design.  If you intend to use two different types of tile in your design, say a larger square on the lower portion and a smaller square on the upper, split the area into thirds.  You will want your larger tile to go up 1/3 of the height, then the smaller the remaining 2/3.  For example, the height to tile in my shower was 60 inches.  I used 6″ square tiles.  I placed 3 of them on the bottom creating a height of 18 inches, then the 3 inch border – this got me pretty close to 1/3 – and I tiled the remaining with the smaller tiles.  The thirds rule doesn’t have to be exact.  My 1/3 was 20 inches, but my tile went to around 21 inches.  This is not a big deal, this is just meant to make the design aesthetically pleasing.

Now that you have your area in mind and what a good 1/3 rule would be, head to the home improvement store.  Try to find tiles that would fit your area with minimal cutting.  Some stores will cut tiles for you, but it is hard to get exact measurements cut, then apply them at home.  If you will be doing a lot of cutting, I suggest renting a wet tile saw or purchasing one if it is worthwhile for you.  Do keep in mind the small tiles are very difficult to cut and may shatter, so don’t bank on cutting a lot of those.  I’ll talk about how to work with small tiles later.  While you’re purchasing your tile, you also need to figure out how much grout, thin set and supplies you need.  Some supplies to think about include:

Tiles
Thin set

Notched Trowel (smaller notches for smaller tile – 1/8″ notches are good for anything 6″x6″ and under)
Grout
Grout float
Spacers (If you buy sheets of tile, get spacers that match so grout lines are consistent throughout the project.)
Caulk
Sealer
Tile saw

Cement backerboard and non-corrosive screws

Ones you probably have at home (measuring tape, long level, utility knife, drill, pencil, plumb piece of lumber, old sponge, bucket, cleaning gloves)

Starting the new shower

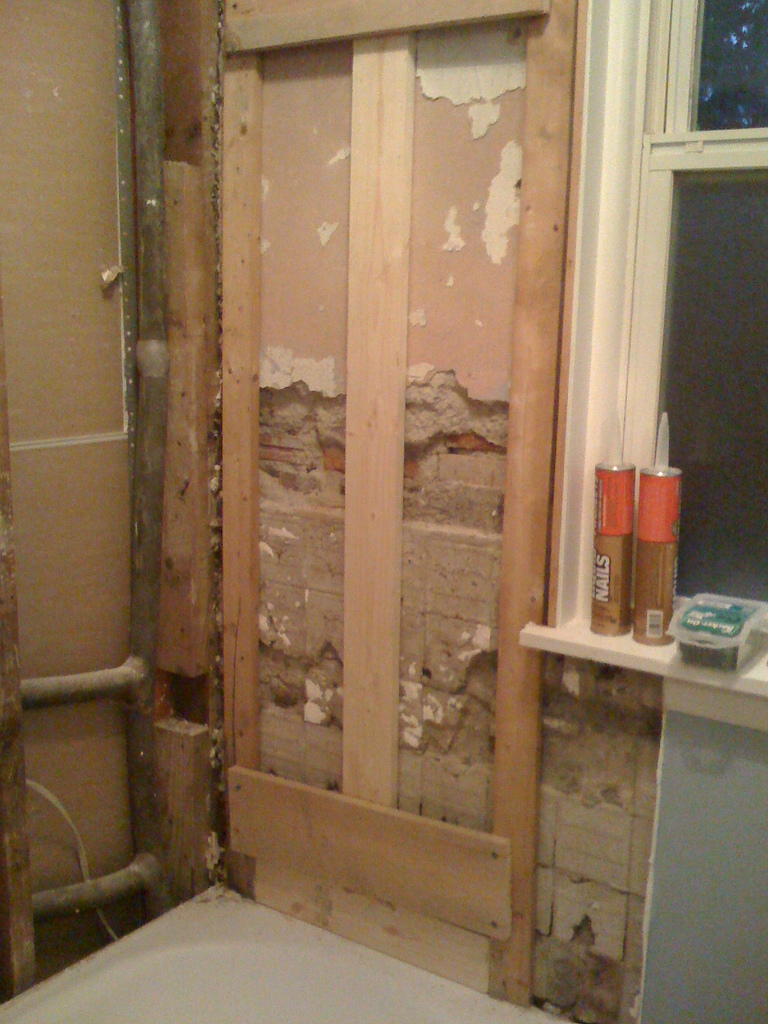
The one thing on the list you might not be thinking about is backerboard.  This is something you need for all tiling jobs.  Some people just tile over drywall, but that is risky.  The backerboard can be cut with a utility knife just like drywall, but is much sturdier and mildew resistant!  Purchase enough for the area of the tiling job and some non-corrosive screws (usually right by the backerboard).  Some people install it over existing drywall, but that elevates your tile another 1/8″ – 1/4″ from the wall above it.  I cut out the old drywall from around the tub and installed the backerboard – just measure the height were you want your backerboard (48″x60″ sheets), mark a level line on the drywall, and use your utility knife to score.  To find the studs easily, mark them on the wall above the backerboard.  Screw it into place and make sure it doesn’t shift or flex.  Don’t worry about patching seams as you’ll just be putting tile over it.

Backerboard !

Once your backerboard is on, clear out any unnecessary tools (drill, utility knife, grout supplies) and trash.  Take the piece of plumb lumber, your pencil, level and start working on your tile layout.  Figure out where a level starting line would be for the tile – don’t trust the tub, it may not be level or may have a decorative edge that will fool you!  Mark level lines on your lumber where the tiles should be.  This is much better than making lines on the wall some sites promote.  Why?  You cover those lines over with thin set before you place the tile.  Get it?

Now you’re ready to tile!  Get the notched trowel with some thin set on it, smear it around on a 3’x3′ area, now use those nifty notches to level the thin set.  Scrape off any thin set excess off the trowel into the thin set bucket, use the notches at a 45 degree angle to scrape.  This will leave grooves, which are just fine even if some backerboard is showing through.  Using the notches makes the thin set level, so none of the tiles stick out more than others.  Using your lumber with marks, set the first row of tiles, then work from there.  Make sure the tiles are level to the lumber lines!  Obey the lumber – again, the tub or bottom of the wall may fool you!  Use the spacers to keep the grout lines even.  Clean off thin set on tiles and bubbling up between tiles.

New bathroom tile

When cutting tiles, make a dark line on the tiles where you need to cut.  This will wipe off and making it dark will ensure you can see it when working with the wet saw.  To do a corner, make sure the cut edge goes into the concave corner so it’s covered up by the grout in the corner.  With convex corners, make sure the cut edge isn’t sticking out, turn it so it is in the tile wall and not the edge.  You want clean, crisp edges showing.  Save fall off from cut tiles just in case they’ll work somewhere else.  With the tiny tile (under 1″), cutting is pretty difficult.  They’ll cut, but they’ll also chip.  Work them into a concave corner by pushing one side into the corner behind the others, so the other wall’s tiles will intersect with the others.  Once grouted, it’ll look nicer and be a clean edge without chipped tiles.  If you have to omit a row, it won’t look bad on a concave corner, considering the grout in the edge will cover much of the gap.  On a convex corner, think of putting a decorative piece instead.  Think creatively.  Make sure all tiles are set by giving them a firm squish into the thin set.  Let set for an hour.  Go back and make sure no tiles are sagging.  Spacers can be removed or left in for a few hours.  Let set for 24 hours.

Fenton, Dec 7, 2008

To grout the tiles, after letting set up in thin set for 24 hours, you’ll use the grout, float, sponge, bucket and gloves.  Use the float at a 45 degree angle to the grout lines and squish the grout in.  Scrape off excess by using the float at an angle.  Wipe excess into other grout lines or into grout bucket.  Work a 3’x3′ area at a time.  Start at the top and work your way down.  This is so you don’t wash the grout out when you clean the surface of the tiles.  Now, take the bucket and fill 3/4 with warm water.  Get sponge damp, but wring out so not dripping (wring in the sponge out in the empty space in the bucket so messy water doesn’t spray all over) .  Use a circular motion to clean excess grout off of the top of tiles.  Rinse sponge and change water often.  Don’t get in a rush and use a soaking sponge – this will only wash the grout out of the grout lines.

Once finished, let the grout dry for 2 days if in dry place, or 7 days in shower (at that time, seal the shower and caulk).  DO NOT try to shower with plastic covering tiles in a shower.  The moisture in the air will make the tiles moist and lengthen drying time.

Now, step back and admire your DIY tile.

Update to: Heating Small Outbuildings

One of These Things is Not Like the Other
Photo by Chris Koerner.

A few weeks ago I went down to the coop to find a 250 watt heat bulb melted through the 5 gallon bucket bottom.  The plastic was fused to the heat bulb.  I promptly unplugged the two heat lamps and opened the windows to the coop.  Luckily, plastic only smolders.  Don’t fumigate your livestock.  Nix the plastic buckets.

I made a trip to Lowe’s a few days later on a Monday evening.  As a cold snap was coming the following day, I had to rig up something, and quickly.  So, here is the new supply list:

1 outdoor extension cord with three outlets long enough to go from the outlet to the rafters (run along the walls neatly would be nice, and safer too!)
3 heat lamps with metal heat shields (buy them for $6 each at the farm supply, instead of the $12 at Lowe’s)
3 250 watt red heat lamp bulbs (spring for the name brand here – I use Phillips bulbs for around $9 each)
15 feet of chain (buy it in a pack and ask someone to cut it into pieces long enough to span between 2 rafters – it’s cheaper than getting chain by the foot) $4
6 pack of S hooks (make sure they are large enough to accommodate the links of the chain) $2

So, continuing from the old article, the power is run from the house to the outbuilding.  The outlet on the wall is first controlled by a hot water heater thermostat.  This you can set to whatever temperature you like – mine is at 45 degrees, but it is less than that as the heat lights have stayed on – the outlet will be turned “off” by the thermostat once the desired temperature is reached, then on again as needed.  I had a 15 foot chain cut into 3 5 foot pieces.  I ran my outdoor grade extension cable neatly up the wall and wrapped three times around the far rafter.  I decided to place my heat lamps about 2.5 feet apart, as the coop is 10 feet wide.  Remember, don’t put the heat lamps close to a wall or rafter!  These things get hot and will catch anything on fire if in contact! Take one length of chain, and one S hook.  Loop the chain over the far rafter and secure the end of the chain to the rest of the chain under the rafter so that the S hook is fully extended.  With slack, the chain might fall if bumped by a chicken.  Lace the lamp onto the chain through the loop above the porcelain socket.  As a precaution, I wrapped the heat lamp cord around the rafter, without leaving slack, and plugged it into the extension cord on the end of the rafter.  I did this in case a chicken bumped the chain.  The lamp would simply hang by the cord – and the worst that could happen in that situation would be a wire coming off of the contact in the lamp – easy fix.  Just make sure when you wrap your cord, you imagine the chain falling – where is your lamp going to fall?  Next to a wall?  Touching a rafter?  A straw bale?  Repeat this for all the lamps.

Keeping the coop at 40 – 50 degrees will keep chickens laying through the winter, but remember to turn the lights down to allow them to go into moult.  This is important in the chicken life cycle.  With heat lights, both the heat and the light created by the lamps alters the laying cycle.  I, personally, don’t heat the coop specifically for winter eggs.  Chickens’ combs and waddles are susceptible to frost bite.  To prevent this, simply rub petroleum jelly on the combs and wattles every few days.  I simply don’t see that as a practical, long term solution, so I’d suggest springing for the heat.

Also, if you are handy enough, these bulbs as well as an outside coop light and an automated hen door can be powered by solar energy.  Too worried about losing power with solar?  Don’t!  If the heat lamps go off in the night, as long as the coop is draft free and you leave the doors and windows shut, it should maintain the temperature until the next daylight.

Just Sleep Already!

Midtown, Dec 5, 2008
Is my Macbook asleep yet?

One fateful day in September 2006, after tracking it all over the world with the UPS widget, my Macbook arrived.  I was so excited, I promptly switched everything from my Powerbook to my Macbook.  Life was good.  I sold my Powerbook to an old high school friend (he loves it, by the way).  One week later, I had my first thermal event.  At some point during the day, my Macbook woke up from its slumber in its cozy Booq bag.  Off to the Genius Bar Chris and I go, of course.  He couldn’t possibly miss a visit to the store of all good and fun.  We explain what is going on.  Off to California my new hotness went.

Today, after two trips to the Apple Store, my computer still has issues of waking and sleeping.  Going to sleep it takes about 30 seconds, but the light never comes on.  Sometimes waking it up starts a whole run around starting with entering my password and ending with ‘killing it’.

I cannot take my Blackbook in for repair until after my final final – and even then, I need my computer.  Considering Chris’ job is so cool and they purchased a new MBP for him, his personal MBP isn’t in use much.  I could use his for a loner, but I need my Blackbook.  To practically resolve the issue for now, I will simply listen to my Macbook to ensure it goes to sleep before putting it into my bag.  Or, I could use the suggestion Tech Support just gave me:  Shutdown your computer until you can send your computer in.  My up time record is 28 days.  I’m sleep’s biggest fan.

So, how do we resolve this, my fellow sleepless Mac-geeks?  You might try the following, and see if they work for you:

Turn off bluetooth
Whenever your computer senses an active, paired bluetooth device near, it wants to communicate.  Thus, waking up from a slumber to do so.  Turn off bluetooth when you’re not using it.  You’ll save battery.  If you use your bluetooth often, follow these steps to enjoy your devices and keep your computer asleep:

System Preferences->Bluetooth->Advanced and uncheck the “Allow Bluetooth devices to wake this computer” checkbox.

Change your sleep setting
My Powerbook rarely had a sleep issue.  Going through the versions of OS X, Apple has changed things a bit.  To switch back to the old, reliable sleep, great directions can be found here.

See what Apple says about sleep in OS X.

Change how it wakes up
Instead of having it wake up when you open the lid, have it wake up when you tell it to do so.  Try this fix here.

Good Clean Fun

Poisoning doesnt just happen from injestion.
Poisoning can happen to anyone.

Created by a bunch of advertising agencies is this fear of germs Americans have.  We bleach everything.  We want stuff that says “Kills 99.9% of bacteria” and other vengeful antics we would only wish on germs.  Did anyone bother to read the warning labels on the back of those wonderful cleaners?  Many of them want lots of ventilation when in use.  Do not ingest or flush with water if in contact with skin or eyes.  Of course, there is the ever popular “Keep out of reach of children”, which, I have to ask, does mopping the floor and allowing my child to play on that freshly cleaned floor classify as “out of reach”?  How harmful are these cleaners which we entrust our family’s health?

Children. They’re ever curious and of course all chemicals should always be kept in a locked cabinet.  The concern here is what sort of residue from these harmful cleaners gets on their skin and in their mouths after cleaning surfaces.  One site I found listed the possible issues created by such common household cleaners.  Most of the poisoning occurs slowly.  Many household cleaner components contain chemicals that have been linked to an increased instance of asthma.

Pets. There have been pet poisonings with some of these chemicals.  Most kidney failure was linked to chemical use.  Children can sometimes let us know when they have something on them to be washed off, but babies and pets cannot.  Pets simply wind up cleaning themselves, and ingesting the chemical.

For more natural cleaners, try vinegar, baking soda, peroxide, and basic soap and water.  There are also some great natural cleaning tips and recipes here.

Kids will be Kids – and That’s Great!

Rub My Belly
Amazing Dog Photo by Chris Koerner

Out of growing concern for Kari, and her increasing complaints regarding both ears, I took her to see the doctor on Monday.  Kari stays with Grandma and Grandpa during the day, so she only sees other kids at the playground and the grocery store.  I vividly remember the “What’s this little guy’s name?” of this past summer at the playground, which lead to chuckles from all parties involved.  At 2 years-old, Kari is just that, a 2 year-old being herself – and that’s great!  She loves other kids, playing and just being a kid.

So, we’re at the doctor’s office in the waiting room.  There is another young lady there.

“She will be 2 in February,” her mother promptly said.
“Kari will be 3 in January,” I said.

Then, something amazing happened – something I have only read about in books:  The mother instructs her twenty month-old child to go shake Kari’s hand and introduce herself like a lady.

“Lilian knows how to properly say hello, introduce herself and shake hands,” the mother says.

At that moment that Lilian babbles something incomprehesible to Kari and extends her right hand, Kari gets down out of the waiting room chair, on all fours, and howls like a dog.

“My daughter has not broken character in 8 months,” I say.

Let kids be kids.  Childhood and imagination only last, for most people, until about 10 years of age.  The remaining sixty years are work, stress and, well, being grown up.  We all need to think like a kid every now and again, and for some of us who are so blessed, we think like a kid more often than not.  Instilling that since of wonder, creativity and astonishment about the world is hard to do, so leave it alone, let it multiply, and don’t zap it before it’s time.