While Chris is not really excited about turning 30, at least I am excited about having a party to celebrate his birthday. With his party about a week away, I am staring to get everything ready. I’m thinking about how much food, cake, plates, forks, decorations, seating, outdoor lighting, etc.
For me, parties always bring a bit of stress – and no, not about planning, but about doing so in a green fashion. Think about it – the plates, napkins, forks, cups, etc. And if people don’t recycle, then that adds to the waste. I am already one to try to recycle anything, so I have come up with a plan to help cut down on waste for Chris’ birthday party, and those we host in the future!
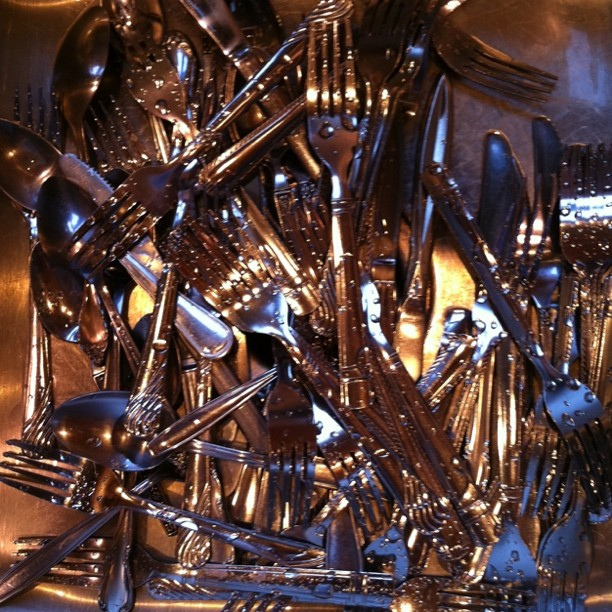
First, I set out to cut down on the plastic forks, knives and spoons. My plan is to collect a mix of old silverware and dip the handles in plastic coating so they’re all unified, inexpensive, and reusable!
To start this project, I had to purchase the amount of silverware I needed ($10 at thrift stores) and 2 cans of plastic coating (found in the paint section of the home improvement store) ($10 each). This comes in different colors, or can be dyed. The only color the hardware store had was yellow, which was fine with me! Just be sure to do this project outside, not just in the garage with a fan…

Step 1: Wash the silverware with a strong dish soap, then dry completely.
Step 2: Find a cardboard box large enough to hold all of the silverware pieces on end – cut slits in box to insert forks, spoons, knives – be sure to measure your slits so they don’t fall into the box!

Step 3: Mix the plastic coating well and by holding the silverware by the utensil end (i.e. fork tines), slowly tip the utensil into the coating and slowly remove. Do not scrape or shake, rather allow any excess to drip back into the can.
Step 4: Insert utensil end into the prepared cardboard box to dry. Allow to dry 30 minutes between coats, or 4 hours before use.
While mine are not finished, here is what some look like so far:

The second project I set out to do involved child labor – lots of it to be frank. Kari and I set out to tackle outdoor lighting. There were 2 requests – eclectic, since cookie-cutter is boring to me, and child safe, meaning no candles with flames.
For the deck rails, I bought 30 (get it, 30?) glass cups, etc. from the thrift store. My plan was to put a candle in each and place around the deck railing adhered by removable putty adhesive. Kari came up with the idea of putting sand in the bottom of each.

Step 1: Collect glasses of various shapes and sizes. I personally chose to stick with simple lines and clear, non-frosted glass.

Step 2: Wash glasses with warm soapy water. Use a butter knife to pry any candle out of the glass after run under hot water for 30 seconds. For those with stickers on them from yard sales, etc. use peanut butter to remove adhesive. Any other oil can be used, but I chose peanut butter for its ability to stay put.
Step 3: Gather your supplies – canning funnel (regular will do, but it’s harder to get sand through), cup, large bowl, sand, and scissors. I say scissors because if you try to rip the bag of sand, it will end up flying all over. If you omit scissors, be sure to substitute vacuum cleaner.
Step 4: Place a portion of sand in the large bowl, and with the cup, scoop desired amount of sand into glasses using the funnel. The funnel helps the sand go straight to the bottom and not stick to the sides of the glass.

I found these LED votive candles online on Amazon for $22, and while they look cheesy in the package, they look pretty good in the glasses.

Kari had so much fun doing this project, I decided to set her up with another lighting project. This one, I hoped, to find some stronger LED lights to place in the jars in order to light up a path, but, finding ones to fit inside the jars is proving difficult. More to come!